This straightforward post explains the basics of creating and designing your products in Printful and finally uploading them to Shopify. To proceed with these steps, your Shopify Store and Printful account must be ready and connected. I will divide the explanation into parts 1 and 2. Let’s start.
Part 1: Configure your product for Printful.
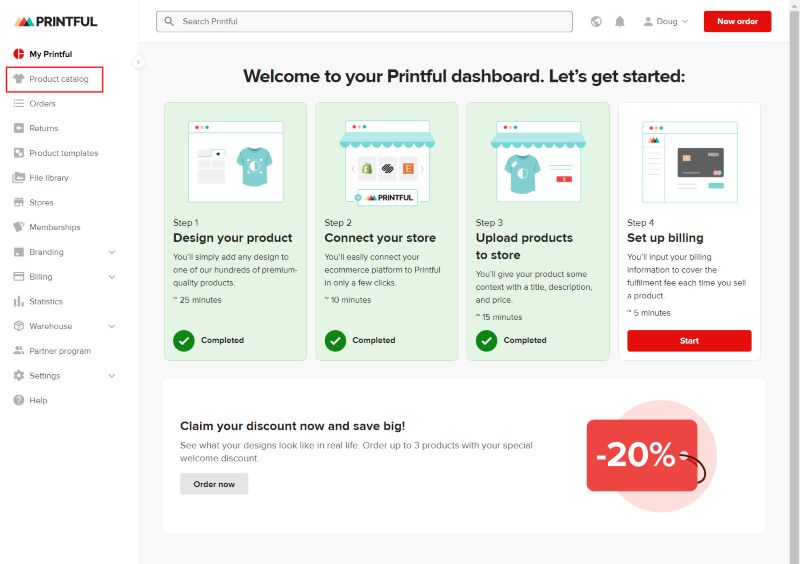
- Go to your Printful dashboard page and select “Product Catalog” in the left menu

2. Once in the “Product Catalog,” select the products you want to sell. You can choose Men’s, Women’s, and Children’s clothing, hats, accessories, and home and living items. Each category has subcategories from which you can narrow your selection. We will select “T-shirts” in men’s clothing for this example.

3. Once in the “T-shirts” section, you must select your preferred item. Remember to analyze the pricing, styling, fabric, and sourcing to pick the right article for your business. In this case, I am going to choose a bestseller T-shirt.

4. Once you are on the screen of the selected item, it is time to set the main characteristics of your product. You can choose one basic size, the basic color of the t-shirt, and the printing technique. Also, you can see the estimated time for delivery and confirm the pricing. Once ready, click the red button “Create product template”.”

5. Once this first template is created, you will be taken to another screen where you will select your design, confirm the printing technique, and specify the variants of your product. For the variants, you can select several sizes and colors. The main menus are pointed with a red rectangle.

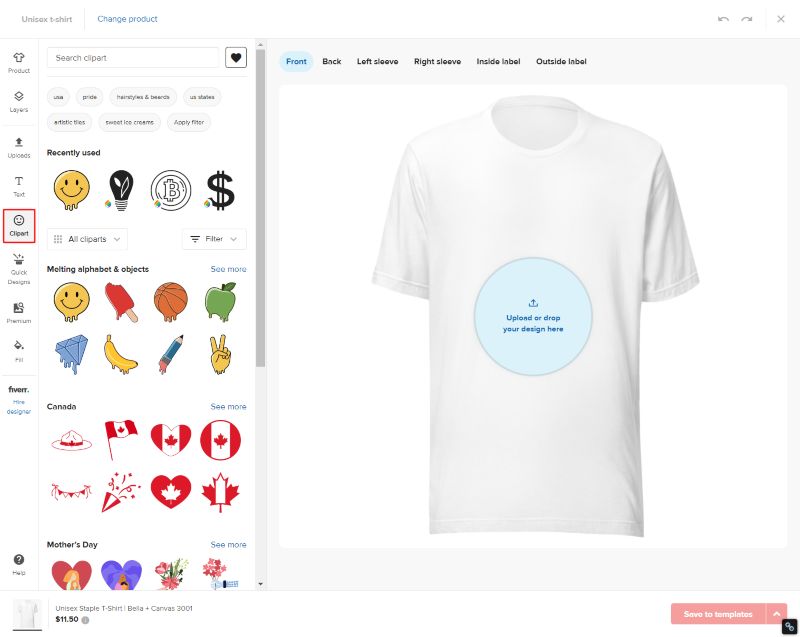
6. The designs can be added in two ways. You can select one from the “Cliparts” area, where Printful provides several options, or you can upload your own design. Both areas are marked with a red rectangle.

7. The “Clipart” area looks like this. Here, Printful provides different designs.

8. Or you can upload your design.

9. Customize your design. Once your art is selected, you can add it to different parts of the T-shirt: front, back, left sleeve, right sleeve, inside label, and outside label. Also, the size, position, patterns, and background can be adjusted here.

10. Once you are done adjusting your design in the t-shirt, click the “Mockups” button.

11. Select your preference’s “main mockup” and click the “Save to templates” button.

Part 2. Sync your template with your Shopify store.
12. You are now in the “Product templates” area. Now, you will prepare your product for upload to Shopify. Click the red button “Add to Store.”

13. Confirm the variants of your product, including sizes and colors. Add new ones if needed. Then click “Proceed to mockup.”

14. Select the mockup for your store. You can select from “basic mockups” or create a custom one with the backgrounds of your preference.

15. Select the main mockup. This picture is going to be the main image of your product. You can select the view of the product in the area of “placement” where you can select front, back, letf, etc. Also you can select format of the image JPG or PNG.

16. Select additional mockups. These images will enrich the description of your product.

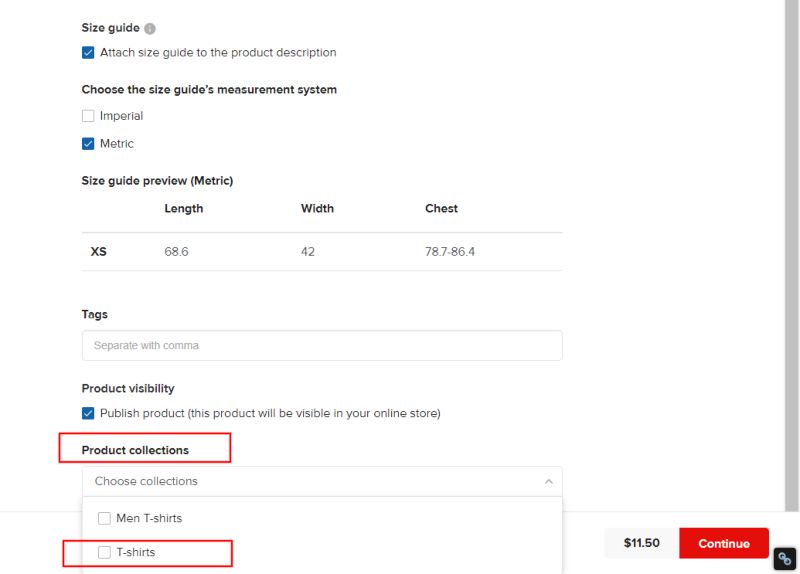
17. Adjust the product details. In this area, you have paramount information for your customers. They are language, product title, description, benefits of on-demand manufacturing, size guide, product visibility (the product will be visible in your Shopify store), and product collection (this will be linked with Shopify product collections). If you think this information is useless or too much, think of yourself: will you buy a T-shirt without knowing the fabric, the sizing, or the delivery time?

18. Select the collection. It is a critical step. The item won’t appear on the Shopify store if the collection is not selected. Collections in Printful and Shopify are synced.

19. Set up your prices. You can do this by increasing a percentage or setting your price directly. Finally, click “Submit to Store”.

20. Here is the result on your front page.

Part 3. Where to find the products you created in Printful. Now, that you have created the products, you must check if they are correct.
21. To verify that you created your products, check the areas of “Product template” and “Stores” in the left menu.

22. Head to “Stores” on the left menu and click your Shopify store.

23. Here, you can see that your new products are uploading to your Shopify store.

24. Also, check in “Product templates,” where you can see all your products, edit them and reuse them as needed.

Well, this is all. Your product is now ready on your Shopify storefront, waiting for your customers to buy it. Your next step is to drive traffic to your shop.


